Tag Archives: growing in buckets

What I Learned- Outdoor Kratky Hydroponic Grow- 2014

See also the post in my “Vegetable Gardening Hydroponic, Videos, Photos and Posts” category for even more information, about what I learned this 2014 season.     (Click on the “About Me” link at the top of this page.   It will take you to my home page.   All my post categories are listed at the bottom of the ‘About Me/Home’ page).


What I Learned- Outdoor Kratky Hydroponic Grow- 2014

The gardening season has ended for 2014.

In this last short video, I wanted to share some of what I learned growing lettuce, pac choi, peppers and eggplant, using the Kratky method of hydroponics, outdoors, from transplanted seedlings started under lights indoors, into net cups in both bins and buckets.        

A few things I didn’t get to mention in the video,  that I learned…

Next year I WILL NOT drill a hole in the bottom side of the bucket, put in a grommet and run a clear tube through it to gauge the level of the nutrient solution.   I found it to be unnecessary, unwieldy and makes the buckets unstack-able for the winter storage.   Since I use those round tomato cages in my hydro buckets (legs through drilled holes in the bucket top/net cup),  I have just enough support of the plant, to just lift the lid a little (albeit carefully) and look to see if the nutrient solution is running low, or add some from a gallon jug.

The panda film (thick plastic bought online that’s black on one side and white on the other), worked like a dream.  It kept ALL algae from the inside of both buckets and bins.  The only other thing needed I learned, was the black bucket top/6″net cup that covers the buckets, should be painted with a good quality white spray paint.  I did that and the paint still looks brand new, and, just like the white side of the panda film, reflected the HEAT away from the nutrient solution.  

I found that it helped the loss of moisture to the net cups (rockwool cubes, roots and “grow stones” in them) to cover the cups with aluminum foil taped down over them. I believe it really helped evaporation of the nutrient solution as well, and kept anything (including sunlight) from getting to the roots.  I learned (for the bins) that if I have a dark bin and younger plants that don’t yet fill the top space- it also helps to cover the top of the bin itself with aluminum foil.  It doesn’t have to be neat and just a few pieces of packing tape will hold it down.  I found (just like soil in container plants outside) that aluminum foil reflects light back to the plant’s undersides, confuses insects and, most importantly in these hydroponics, reflects the sun’s HEAT away from the nutrient solution and the plant’s roots inside. 

5 gallon Buckets-  I have used the white ones from Walmart, Lowes and Home Depot.  After a season or 2 at the most, they are too brittle to carry, fill, move, and shatter into small sharp pieces.

Try the ORANGE paint buckets from Home Depot… less than half the price.  You don’t need the tops and they will be covered by panda film around the sides and the bucket top/6″ net cup painted white on the top, so the dark color matters not.  They appear to have more rubber and less of the cheap brittle plastic in them- so they should last many more years.

Last but not least.. I learned I love this form of gardening.  Though I will still grow my peas, basil, tomatoes, radishes, swiss chard etc. in the soil, in containers in the front yard, next year… I will grow everything I grew hydroponically this year (and probably more) on the deck again in 2015.

I think the rest of what I learned is in the short video wrap-up below. For you gardeners out there- I hope to see you back here with posts and videos of my inside seed starting in the spring of 2015.

Enjoy!             Rebecca

UPDATE Sept 22nd, Hydro Kratky buckets – Eggplant, Cucumbers, Peppers

The five gallon Kratky method hydroponic buckets and one 10 gallon bin are still producing good produce.  Here in West Virginia, we can have frosts as early as Sept 30th.  Tomorrow night we go  down into the high 30’s at night (but in the 70’s daytime), so I I’ll have to protect the eggplants and the pepper and the cuke for each night, in the hopes of keeping them going until the weather gets warmer again in a week.

As you can see, the eggplants are of harvesting size (and went with tomatoes, basil & parsley in a tomato / eggplant  & cheese (one crust) pie last night).

The H-19 cucumber has produced cukes of  anywhere from pickling size to these huge ones- for cucumber salad.  I found the skin a tiny bit thick at this large size, so I’ve been peeling these, (unnecessary if picked smaller).  (My fingers are stained from dehydrating plums and peaches this week).

The Boris sweet peppers are doing great- large & small go into everything- eggs, chili, etc. 

I should comment again, that these 3 plants are taking additional water at least once a week (nutrient solution).  The cuke in the 10 gallon bin and the eggplants and pepper in the five gallon buckets all take the same 2 gallons of nutrient solution each week.  Unfortunately, they have all had bouts of running dry  completely down to the bottom of the container.  Obviously this has taken a toll on the plants….. but bless their hearts- they keep producing.

H-19 Little Leaf Cucumber Sept 22, 2014 still juicy & firm, even at this size.

H-19 Little Leaf Cucumber Sept 22, 2014 still juicy & firm, even at this size.

H-19 Little Leaf Cucumber in a 10 gallon bin / tote

H-19 Little Leaf Cucumber in a 10 gallon bin / tote

Hansel Eggplant Sept 22, 2014.  The spotted leaves are either from running out of nutrient solution or stink bug damage.

Hansel Eggplant Sept 22, 2014.  I believe the spotted leaves could be a result of running out of nutrient solution or the PH, which changes in the nutrient solution, might also be way off at this point- too acidic or too alkaline. Then there is the possibility of a virus, as a result of the explosion of new stink bugs and the crud they carry in their bites.

Hansel Eggplant, loaded with eggplants of all sizes

Hansel Eggplant, loaded with eggplants of all sizes

Hansel eggplant Sept 22, 2014

Hansel eggplant Sept 22, 2014

Gretel Eggplant Sept 22, 2014, still smaller than Hansel, but producing many eggplants

Gretel Eggplant Sept 22, 2014, still smaller than Hansel, but producing many eggplants

Boris pepper Sept 22, 2014. The foam is just helping hold up the plant against the round tomato cage's legs that go through holes drilled in the bucket net cup rim cover.

Boris pepper Sept 22, 2014.   The foam is just helping hold up the plant against the round tomato cage’s legs, that go through holes drilled in the bucket net cup rim cover.

UPDATE Sept 7, 2014 Hydroponic Cucumber, Eggplants & Pepper

The nights are getting downright cold.  I haven’t found the time to start seedlings of lettuce or choi under the lights in the bedroom to put into the hydroponic 10 gallon bins on the deck.  (I’ve been too busy with the beans, new peas, basil and tomatoes in the soil containers in the front yard).

But, the cuke, eggplants and pepper (planted out in the hydro bins June 17th) are still going gangbusters in their Kratky method hydroponic containers on the deck, so I thought I’d show you and give you some additional info on the growth progress and variety names etc.

H-19 Little Leaf Cucumber in a 10 gallon Hydroponic bin, as of Sept 7, 2014

H-19 Little Leaf Cucumber in a 10 gallon Hydroponic bin, as of Sept 7, 2014

These ‘H-19 Little Leaf’ pickling cukes get easily 4+ inches long and they are firm and tasty. As of Sept 8th, I have picked a cuke every day for a salad, for 2 weeks now.
I have not needed to replace any nutrient solution in the 10 gallon bin/tote yet. (It went in around the 3rd week of June, but since the early small leaves had spider mite, the newer stronger leaves didn’t take off, and make lots of flowers and large cukes, until mid August). They have the same nutrient solution as all the rest (see earlier posts for details).

The H-19 Little Leaf pickling cucumber closer up, as of September 7, 2014.

The H-19 Little Leaf pickling cucumber closer up, as of September 7, 2014


Hansel & Gretel Eggplants as of September7th, 2014

Hansel & Gretel Eggplants as of September7th, 2014

Hansel and Gretel (the names of their varieties) are in 5 gallon Kratky method hydroponic 5 gal buckets, both loaded with eggplants and flowers. They are also growing taller by the day…. I hope they stop growing taller now (should be at their 3 foot height) and just put all their energy into eggplants.


Hansel Eggplant as of Sept 7, 2014

Hansel Eggplant as of Sept 7, 2014

The Hansel & Gretel eggplant variety (from ‘Johnny’s Seeds’)are a small, long oriental type. Hansel is the purple and Gretel is the white- same size & length. They reach about 5-6 inches in length and are about 1.5 inches in diameter. They are totally non bitter and slice up perfectly in anything (stir fry, eggplant parmesan etc.). As you can see they grow in clusters- easy to see & pick.

I would definitely recommend growing this variety in a hydroponic bin (Kratky non-circulating method), but the size of the container needs to be bigger than 5 gal (which really only starts out with a little over 3 gallons of nutrient solution). For the past 3 weeks, I have added to each bucket- 1.5 gallons of freshly mixed nutrient solution as the level drops to almost nothing within 5-7 days.

I don’t really mind mixing it by the gallon and adding a milk jug’s worth of solution (lift up the top of the bucket net cap, with plant tilting on top, and pour in carefully), but if I could find a larger capacity container that has the same features as the bucket- I might go that route in the future. The bucket-covering 6″ net cup and the tomato cage that goes into the bucket through holes drilled in that net cup/bucket cover, is important.  The cage holds up the netting cover until the plants are huge and flowering well, and after the netting comes off, the cage helps support the 3 foot eggplant from toppling etc. I just don’t know what other system/container, net cup, cage system I could use to get the same results of protection and support. So 5 gallon buckets are my choice for now, and I’ll just keep adding solution. It’s still easier than watering everyday (as I have to, for my container soil plants in the yard).

Gretel Eggplant as of Sept 7, 2014

Gretel Eggplant as of Sept 7, 2014

Gretel grows a little slower than Hansel, but if you look in the middle you can see her little white eggplants coming on strong.


Pepper & eggplants in 5 gallon buckets as of Sept 7, 2014

Pepper & eggplants in 5 gallon buckets as of Sept 7, 2014

The Boris pepper and behind it, the 2 eggplants, sit on the deck in their hydroponic (Kratky non-circulating method) 5 gallon buckets. They are covered (as are the now-empty lettuce bins), over all with plastic over an old canopy frame. The nights are getting colder, so the extra protection is good for both types of plants.


Boris Pepper as of September 7, 2014

Boris Pepper as of September 7, 2014

The Boris pepper up close. We have already harvested 4 peppers that were easily 6 inches long, and a good diameter. The size and production of the Boris variety is great- but the taste is not as good as any old banana pepper (not as sweet or as pepper-ry tasting).

I am however, definitely impressed with the ease and production of growing peppers in a 5 gallon bucket

UPDATE Aug 17, Hydroponic Outdoor Grow VIDEO- 5 gal buckets w/ eggplants

This is an update video of my hydro grow on the deck, ( non-circulating hydroponic Kratky method ), to show the SUCCESSFUL progress of the hydro 5 gallon buckets holding 2 eggplants, a pepper and a large red pak-choi.

I also show how the hydro bucket was put together and give my measurements and mixing instructions of fertilizer, in the nutrient solution in the buckets, as I replace some.

Lastly, a quick visual update of the lettuce and baby pak-choi in the totes- by the time you read this, most will have been harvested.

July 27, First 2014 HYDROPONIC Outdoor Grow VIDEO

Here is my newest garden adventure- using the Hydroponic Kratky growing method in bins & buckets. The seedlings came out from under the lights when they were 8 weeks old (too old) after having been seeded May 17.

They ‘went hydro’ on July 17th.

This movie shows their remarkable progress 10 days later by July 27th.

VERY SUCCESSFUL. Growing lettuce, pak choi, eggplant & peppers outside on the deck (but undercover) in net pots in bins and 5 gal buckets, using the Kratky non circulating hydroponic method.
10 gallon bins/totes are in homemade PVC pipe cages with homesewn netting covers.
Five gallon buckets are growing eggplant, pak choi and peppers with small tomato cages and home-sewn net covers, using the same hydroponic method.
Nutrient solution for all is Master Blend + Calcium Nitrate + Epsom Salts (tomato formula).

A post with more information on the method and supplies used, is with my Vegetable Gardening- Hydroponics page-  listed in the Post Categories choices at the bottom of my HOME/ ABOUT ME page…

VEGETABLE GARDENING in CONTAINERS w/ SOIL, Photos & Posts

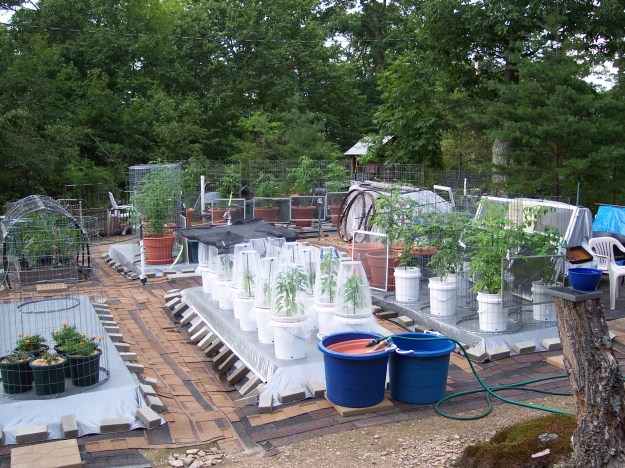
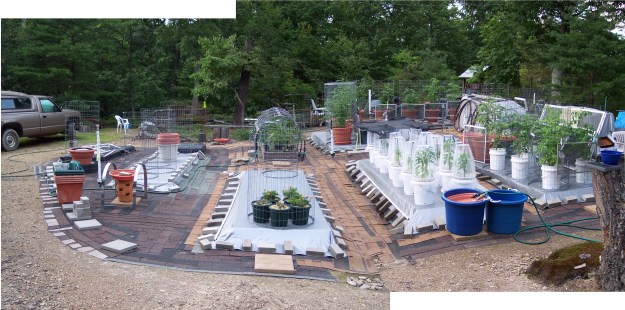
We are in the Appalachian Mountain chain, one of the oldest on the planet. After millions of years of erosion, we have only the tiniest bit of soil before we hit shale and then bedrock. So pots it is…….

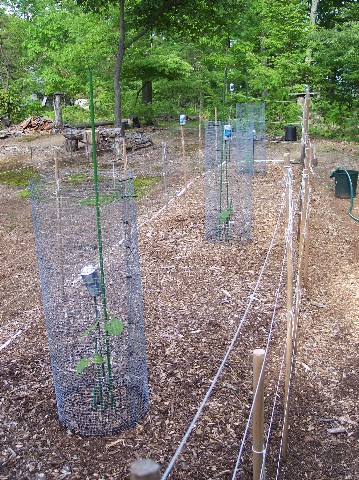
The cages and netting covers are for deer, raccoons, woodchucks, skunks, opossum, rabbits, chipmunks, birds, lizards and insects.

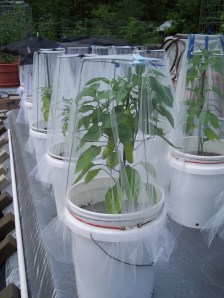
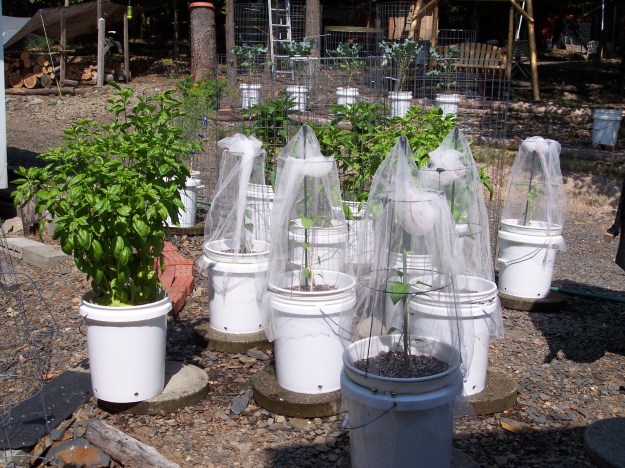
I use netting (bridal veil netting fabric sewn into a large circle) over the plants to keep the bugs at bay until they are strong enough to survive. Our garden is closely and totally surrounded by acres of mountain woods, containing millions of insects of all shapes and sizes and certainly many are hungry for a snack at my ‘salad bar’.

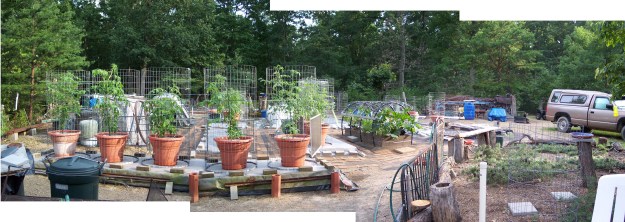
Following are some photos of our past and present vegetable gardens.
Some are from the big garden over at our old round cabin. The rest are from our house (through the woods and across the hollow from our old round cabin) where last year we grew eggplant in pots and cukes and squash in buckets on a trellis (on our deck) and tomatoes, peppers, broccoli, lettuce and herbs in pots & buckets (in the front yard).

This season, in the front yard, we grew cherry tomatoes in the ground (they were volunteers from last years pots), beans in pots, cukes in buckets growing up on the trellis and herbs in both pots & buckets. After a huge pickling- cuke harvest, now those cucumber buckets have gone over (August 7th) to fall Wando English climbing peas,

This season we turned our deck over to growing lettuce, pak-choi, baby eggplant, one pepper and 1 pickling cuke to the hydroponic grow experiment. I will be growing almost the same things, the same way and locations next season. Make sure to see the latest posts and small movies of this year’s hydroponics grow on the deck, elsewhere in this blog, as it was a wonderful and productive success.

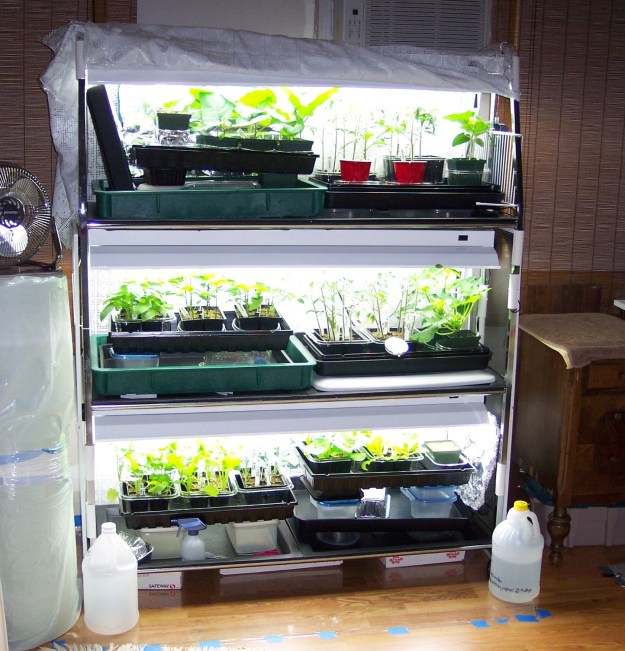
The seedlings under the lights. The only place to put them is the bedroom- the lights come on at 5:30AM and shutoff at 9:30PM.

Lettuce seedlingsto be planted in window boxes & soil

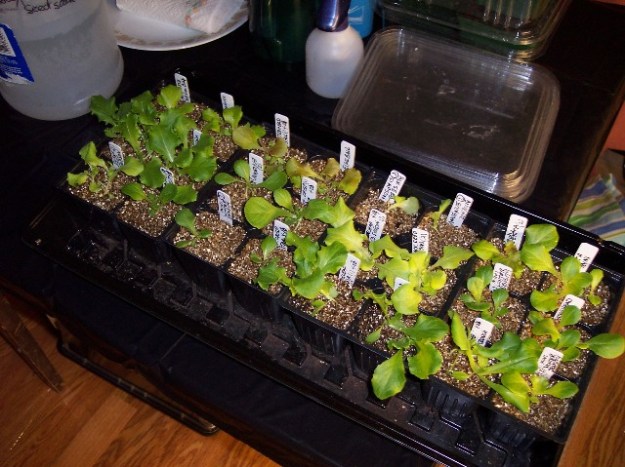
Lettuce seedlings for past seasons to be planted in containers with soil


Pattypan squash direct deeded in 5 gallon buckets on a trellis on the deck

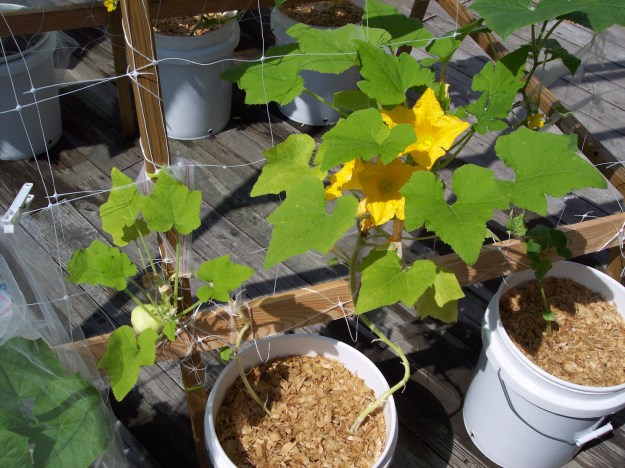
Patty pan squash growing well in buckets on trellis. The mulch is Aspen shavings. I get it in very large bales at the large chain pet stores- (an unopened bale just barely fits in a 35 gallon trashcan). It is sold as animal bedding. As plant mulch it holds a perfect amount of moisture, it doesn’t seem to rob the plant of nitrogen like other wood shavings do, it has no toxic resins like pine or cedar and it decomposes very well at the end of the season when mixed with the old soil and composted.


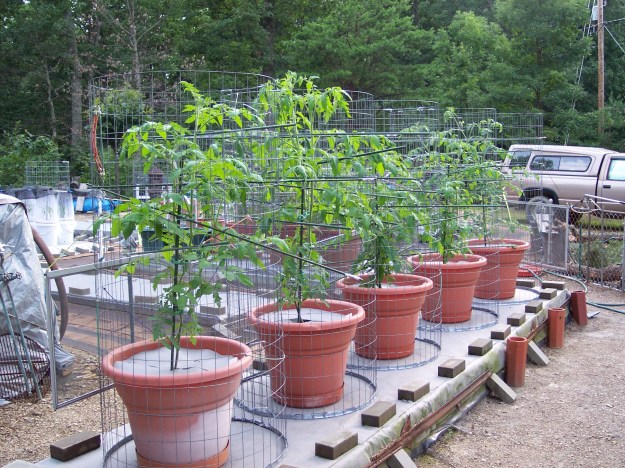
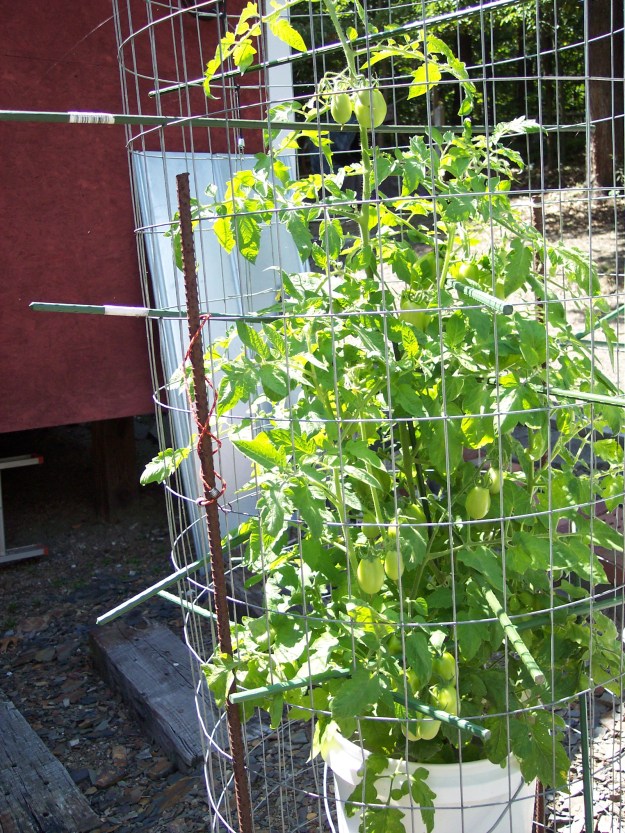
Indeterminate tomatoes on tarp covered wood pallets. Later in the season, another 3 foot section of fencing circle had to be attached at the top, as the tomatoes filled the cages width wise, then climbed to a bushy 7 ft. Instead of mulch in the big pots, I cut large circles of landscape fabric with a hole cut in the middle for the plant. This solved the problem of chipmunks digging in the soil and also the light grey reflected light so the soil didn’t heat up. Another benefit was that soil digging insects didn’t dig and lay eggs in the soil. The green stakes through the round cages come through from all directions to help hold up stems until the plant fills the cage. The stakes come in and out and up as needed, as the plant grows taller.


Aug 11 09 (7)

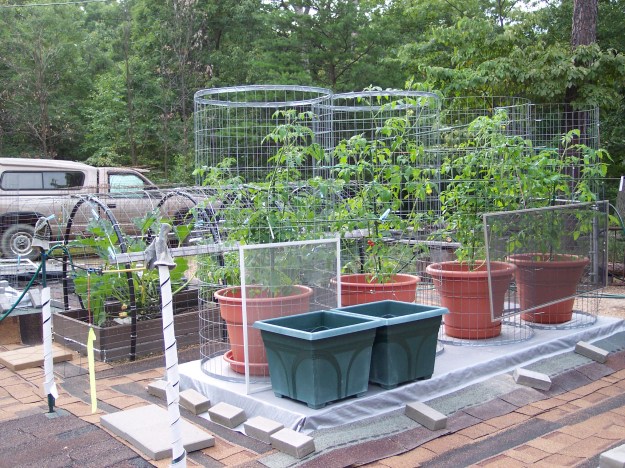
Indeterminate cherry and grape tomatoes. Although they filled the cages width-wise, they were more manageable at the top. I used discarded window screens to block the sun from the pots so the soil didn’t get too warm and at the top as well.

August 1, 2009


Zucchini in bed, cover made from fence wire and well water tubing

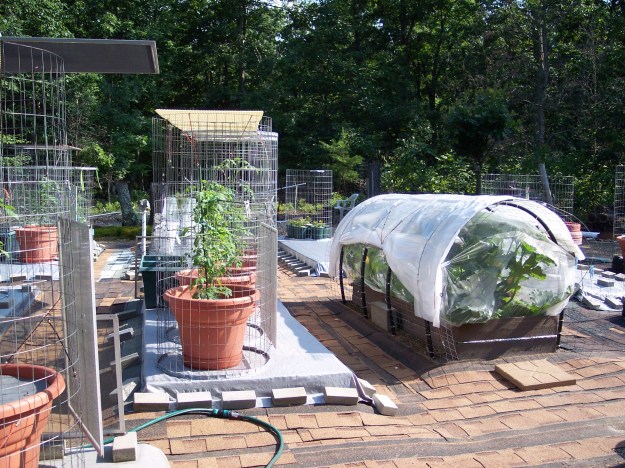
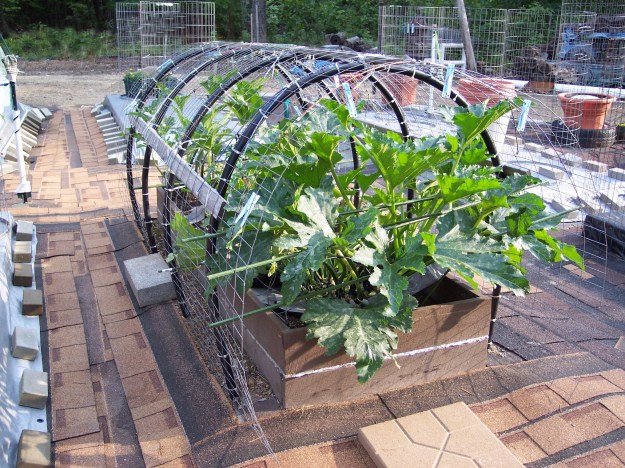
Zucchini in an in ground bed. Cover made from fence wire and discarded (thick) well water pipe. The pipe bends relatively easily and hold shape when stuck into he ground a few inches and zip-tied to the fencing. The zucchini stayed within netting until it had many flowers that needed to be pollinated. The green garden stakes through the fence cage (just like the ones through the tomato cages), are to help hold up the large leaves and stems and can be moved around easily.


The bridal veil netting is for insect protection, the cages are because the garden is in the middle of 20 acres of forest, the used shingles are for the weeds, the bricks hold down the tarps that cover the wooden pallets that the pots sit on

The bridal veil netting is for insect protection, the cages are because the garden is in the middle of 20 acres of forest, the used shingles are for the weeds and the bricks hold down the tarps that cover the wooden pallets that the pots sit on.

Aug 11 09 (26)

Aug 8 2009 panorama 2

Aug 8 2009 panorama 1

Aug 8 2009 panorama 3 redo


Aug 8 09 011

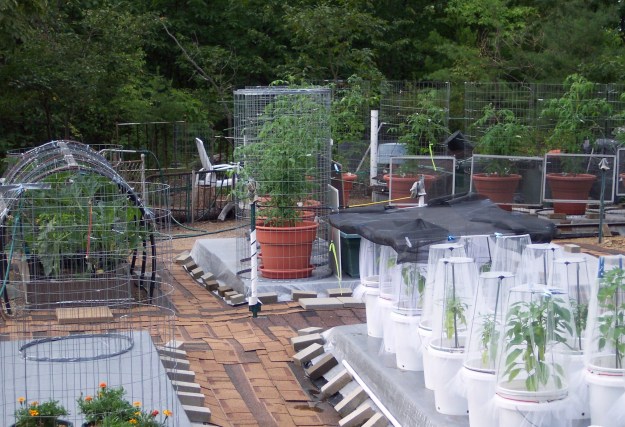
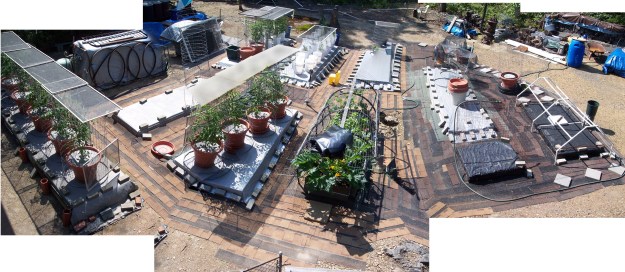
On top of the tomato cages on the left, are discarded plastic grids that were originally used as light diffusers on ceiling fluorescent lights in an office building. They blocked just the right amount of light so the tomatoes didn’t cook at noon. On other plants, I used discarded sliding door screens on top of the round cages or at the sides. Since the zucchini was watered by drip irrigation, when it rained I covered it with that black plastic on top of the cage. By keeping rain off the leaves, it helped a great deal in fighting the scourge of all squash & cukes- powdery / downy mildew viruses as well as other rots.


zucchini & tomatoes

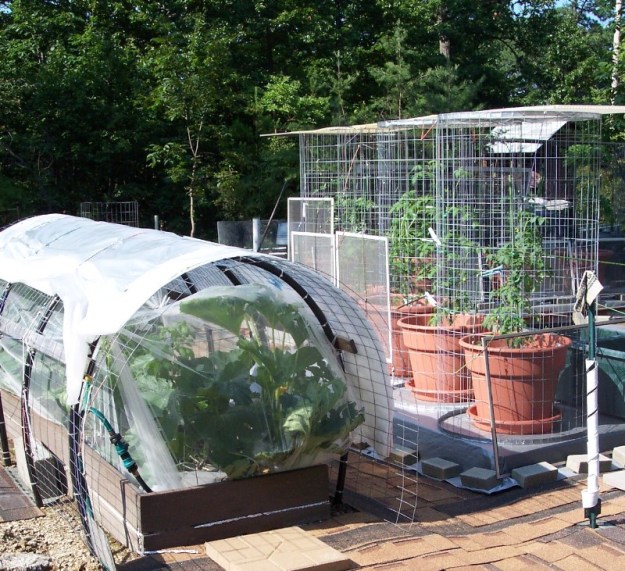
The zucchini was watered with a drip hose (coming in at the left corner of the bed sides). Discarded window screens were clipped to the tomato cages (with clothespins etc.) and moved around as needed to block sun to the pots and also put on the cage tops.


Zucchini

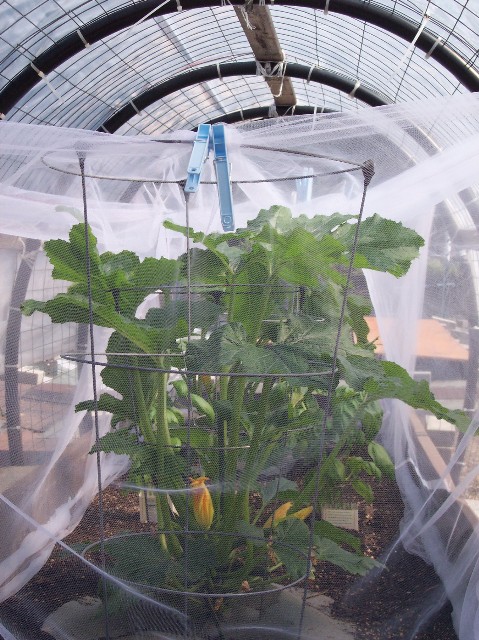
Zucchini still in netting (clipped w/clothespins to cages) and starting to get male flowers.


Baby grapevines

Baby grapevines


Grapes near harvest time

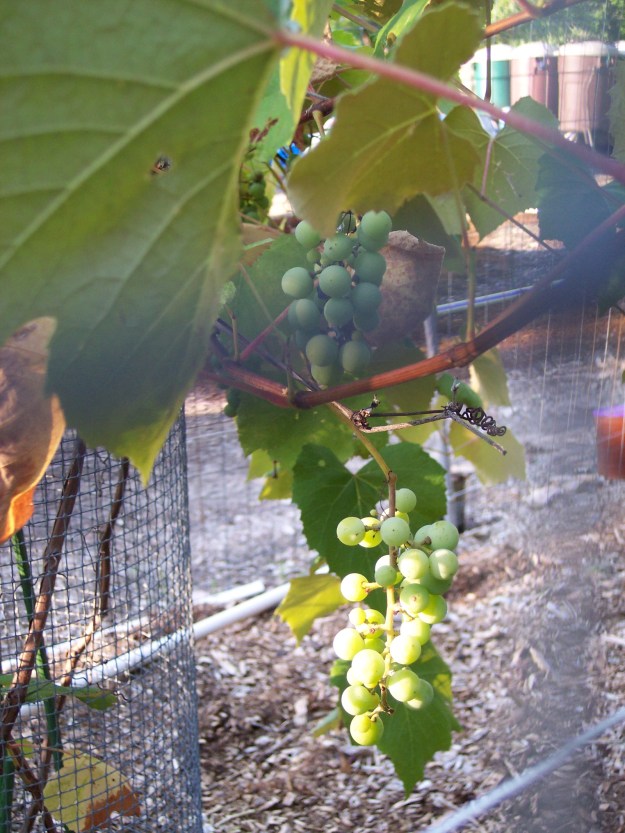
Grapes nearing harvest time 2 years after planting rooted cuttings.


Aug 11 09 (4)

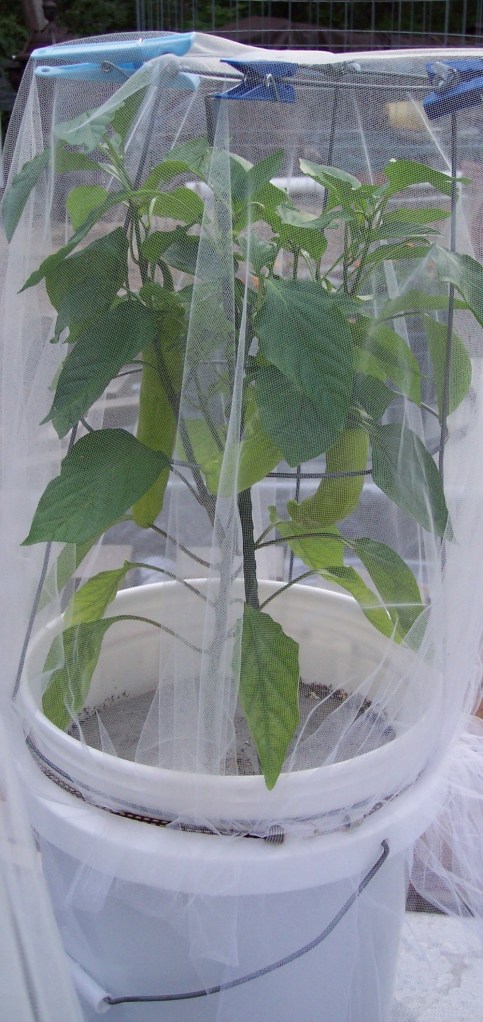
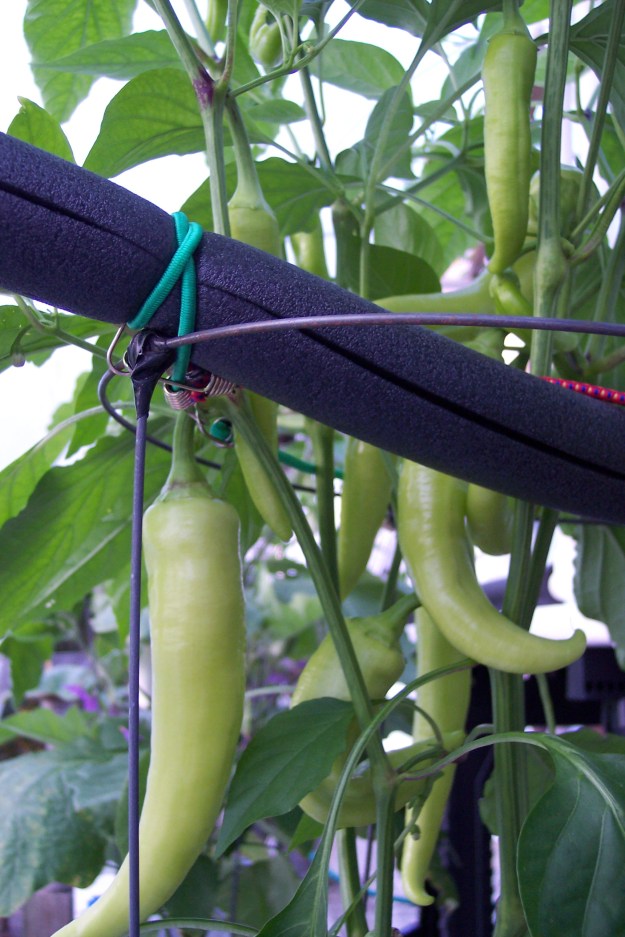
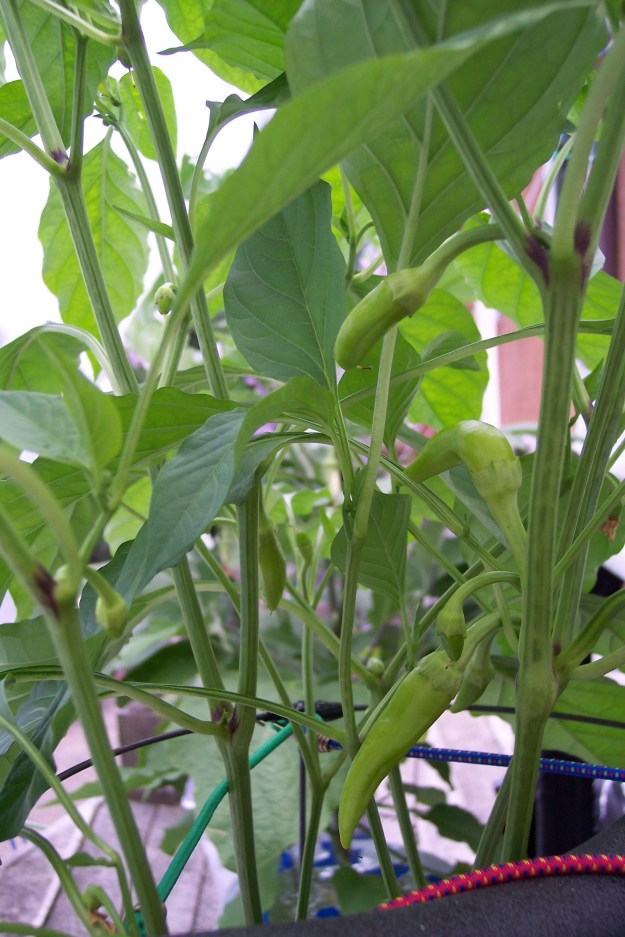
Banana Peppers in 5 gal buckets covered with bridal veil netting, over tomato cages that are turned UPSIDE DOWN with the legs cut off and sharp edges taped with rubber electrical tape. Clothespins clipped to the top of the cage but INSIDE the netting gave the pepper’s leaves and flowers more room to grow width-wise. The pepper is self-pollinating and can live it’s whole life producing it’s flowers and peppers in this protected environment (as long as the pepper plant size fits the netting cover you sew).


Abe Lincoln tomato in a 5 gal bucket

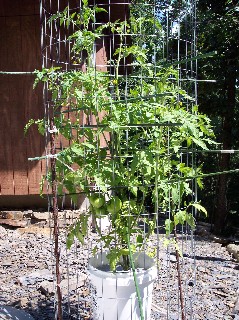
Abe Lincoln indeterminate heirloom tomato in a 5 gal bucket


San Marzano Roma tomato in a 5 gal bucket

San Marzano Roma tomato in a 5 gal bucket


Cherry bomb hot peppers in a 5 gal bucket

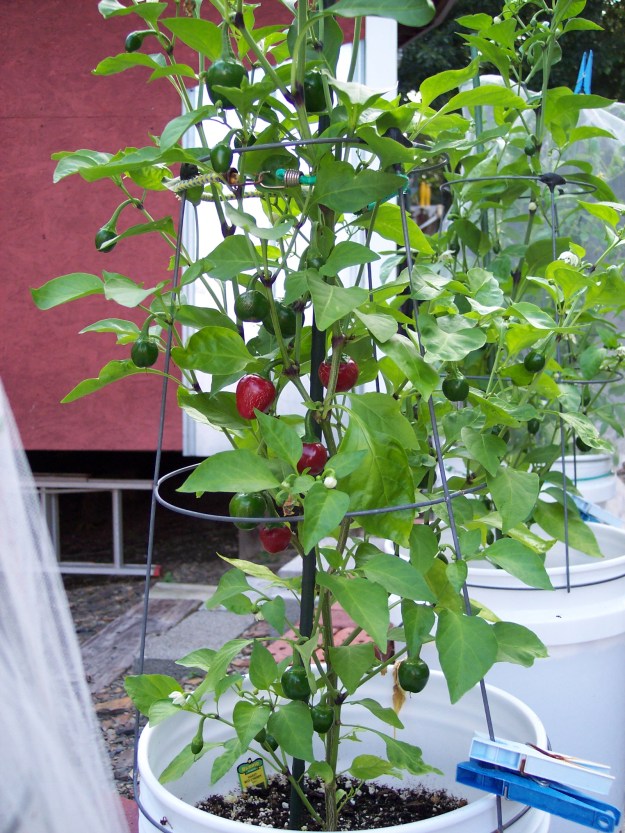
Cherry Bomb hot peppers in a 5 gal bucket


One harvest from Banana peppers grown in a 5 gal bucket

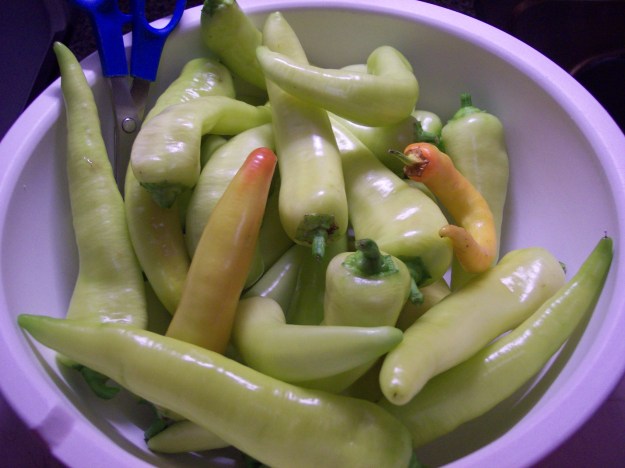
Just one harvest (of many like this) of sweet Banana peppers from one 5 gal bucket


Broccolli growing in 5 gal buckets

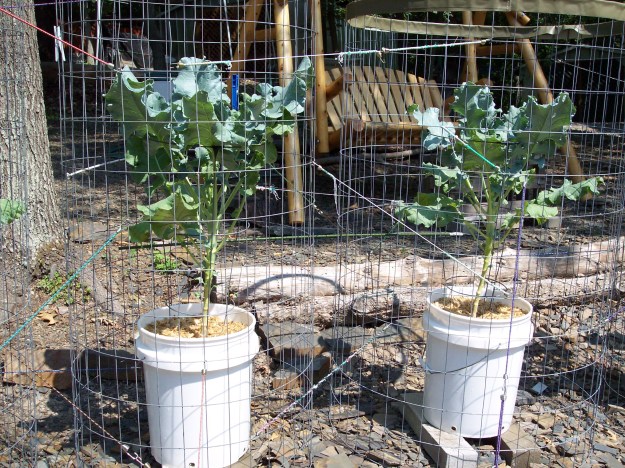
Broccoli growing in 5 gal buckets


Young broccoli that grew to harvest size in a 5 gal bucket

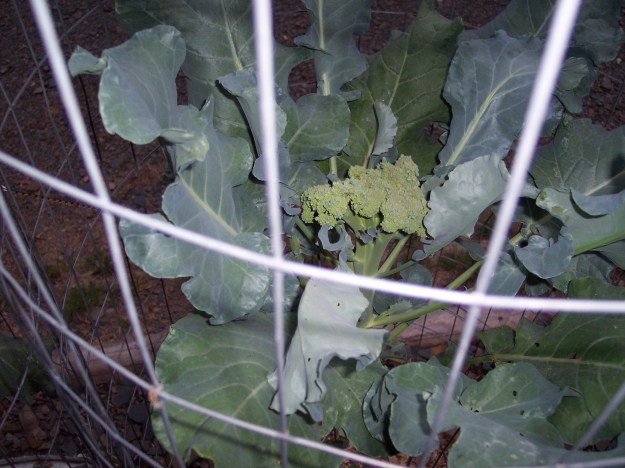
Young broccoli that eventually grew to harvest size in a 5 gal bucket


Basil and peppers growing in 5 gal buckets

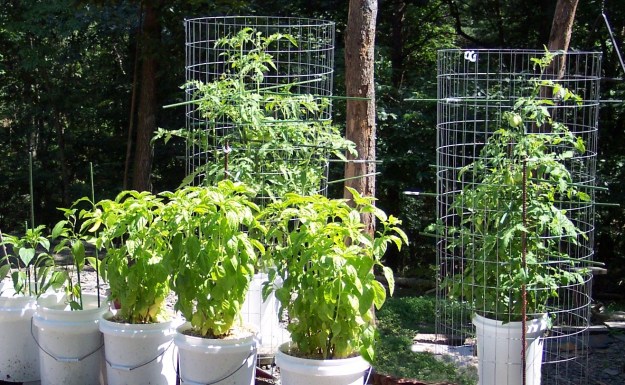
Mature basil and young peppers growing in 5 gal buckets, broccoli in back of photo


Basil just starting to grow in the 5 gal buckets

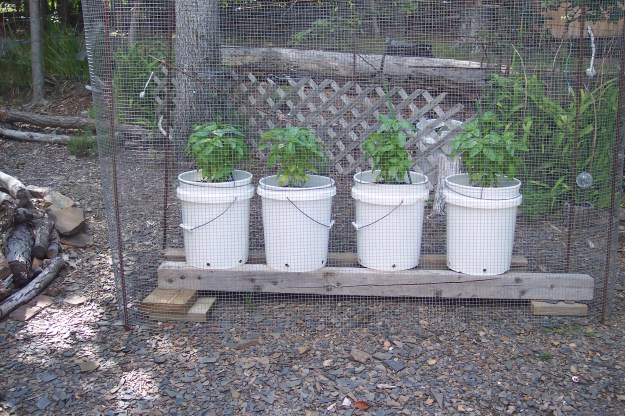
Basil just starting to grow. Each bucket has a tight group of 5 basil plants.


Basil in front and peppers grown in 5 gal buckets

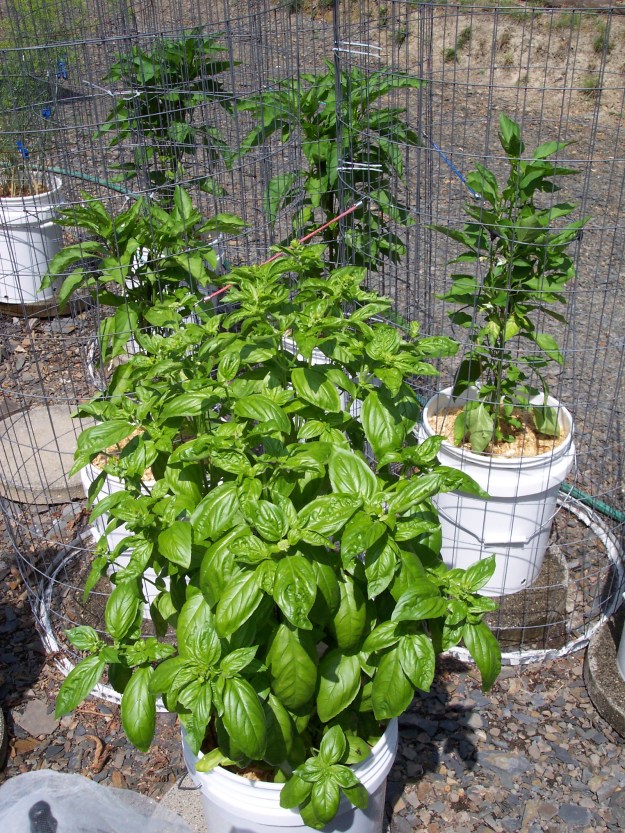
Basil in front and flowering peppers behind


Cucumbers growing in 5 gal buckets on trellis, no longer on deck

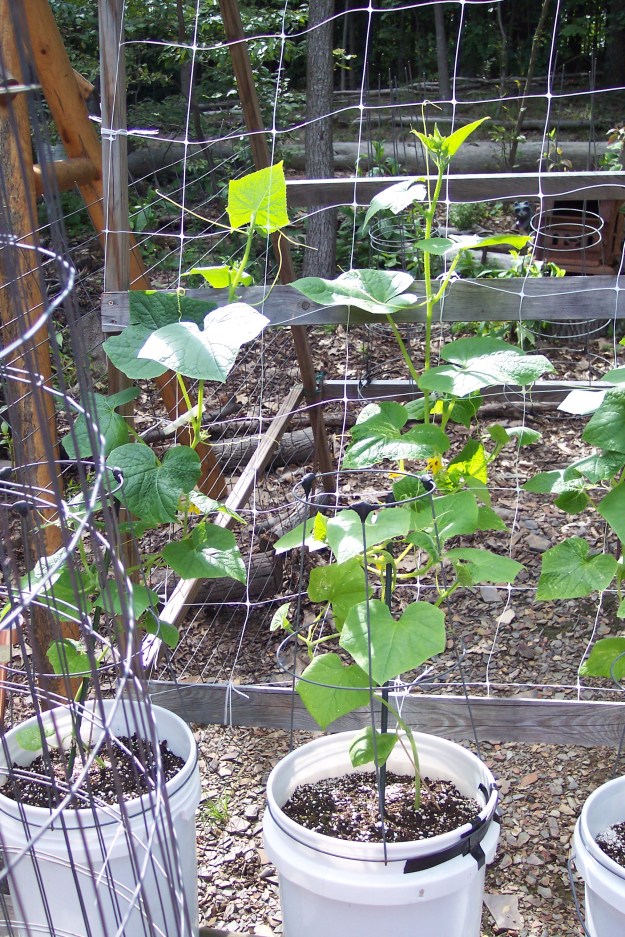
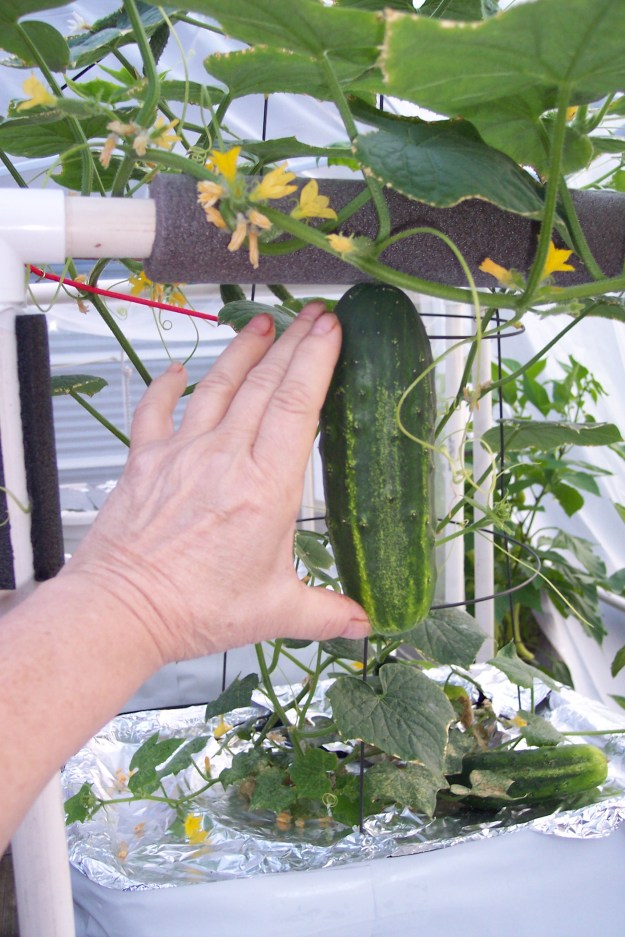
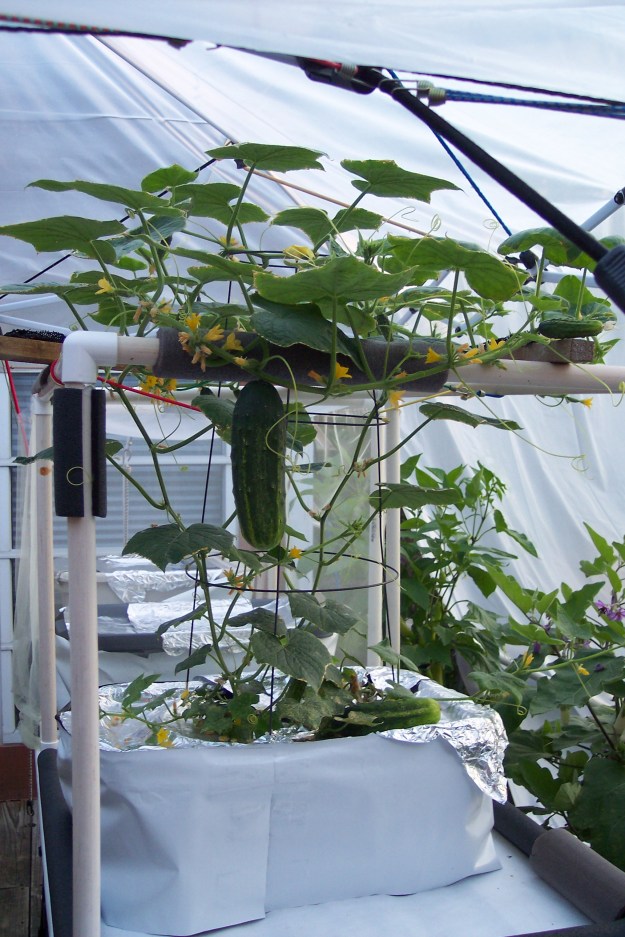
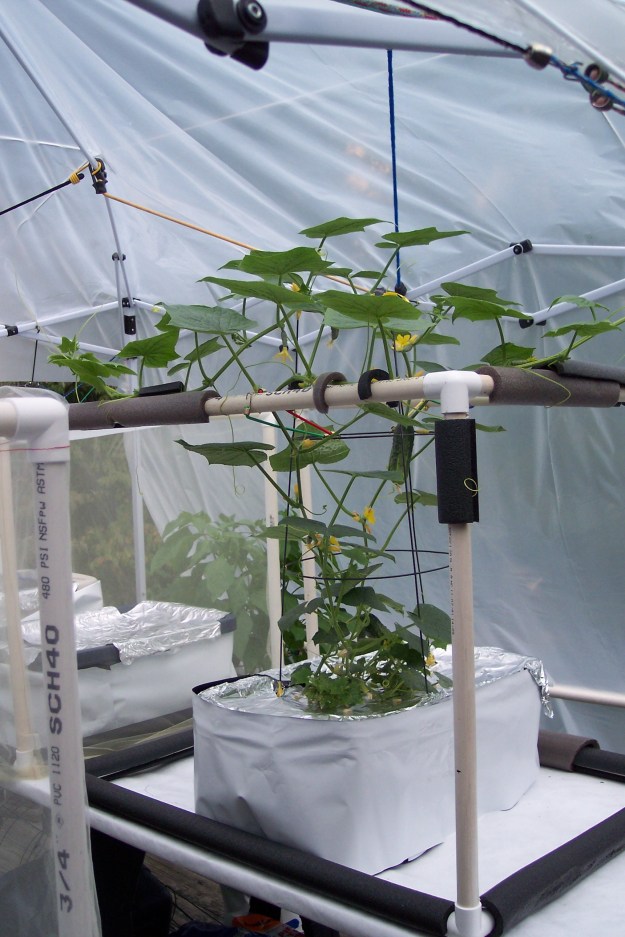
Cucumbers growing in 5 gal buckets starting to climb on trellis, (they are no longer grown on the deck as the last 2 years they grew here in the front yard). Eventually they got Aspen shaving mulch. The netting for each has come off (necessary once the plant flowers-for pollination), but the upside down round tomato cages still sit on each bucket to help support each plant so it can become well attached to the plastic trellis. (The legs of the small tomato cage were cut off- where the legs were, is now the TOP of the cage- shown with blobs of black RUBBER electrical tape, to stop the sharp cut edges from damaging the netting. The largest circle of the cage- if you get the right size of tomato cage to begin with- fits perfectly over the top edge of the bucket and rests on the lip below it. These cages are in their 5th year with virtually no damage. They stack great, even better than tomato cages with legs do, for easy storage in the winter.)


Cucumbers growing in 5 gal buckets on trellis, no longer on deck

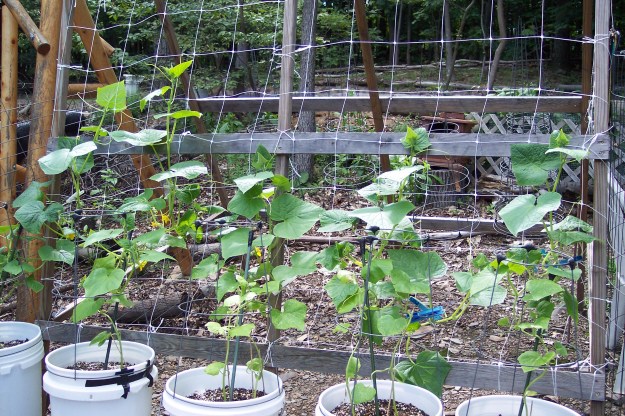
Cucumbers on trellis in front yard, here just making the big climb, but gone over by Aug 7th to direct seeding climbing Fall peas (‘Wando’ variety… as these can take the heat as they sprout and grow, before they mature later in cooler September). I used the same buckets for the peas that the cucumbers had been in, after putting all the soil into the wheel barrel and removing the cuke’s roots as best as possible. I re-filled the buckets after mixing together: the Aspen shavings mulch that had covered the cukes; the soil the cukes were in; some leaf compost; and some osmocote fertilizer.


Cucumbers growing on the deck, in 5 gal buckets, on a trellis

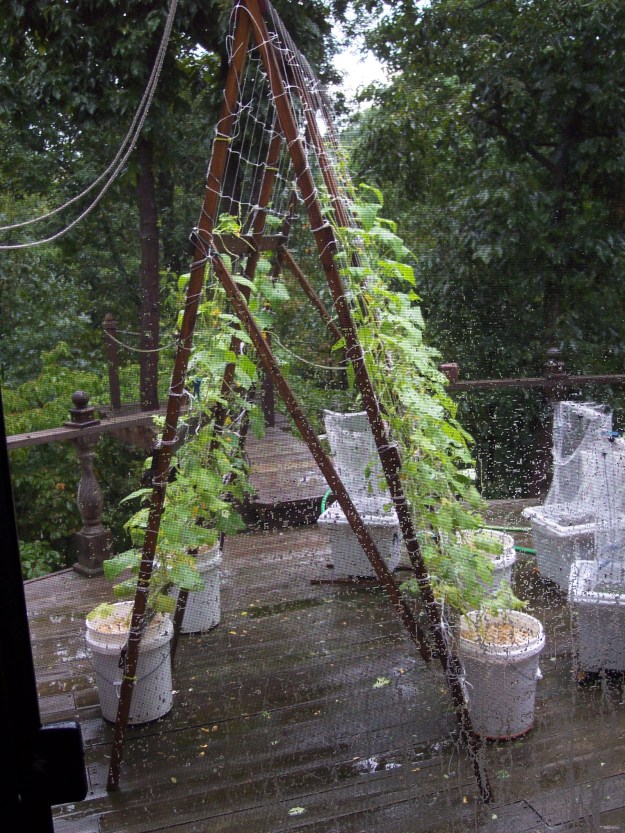
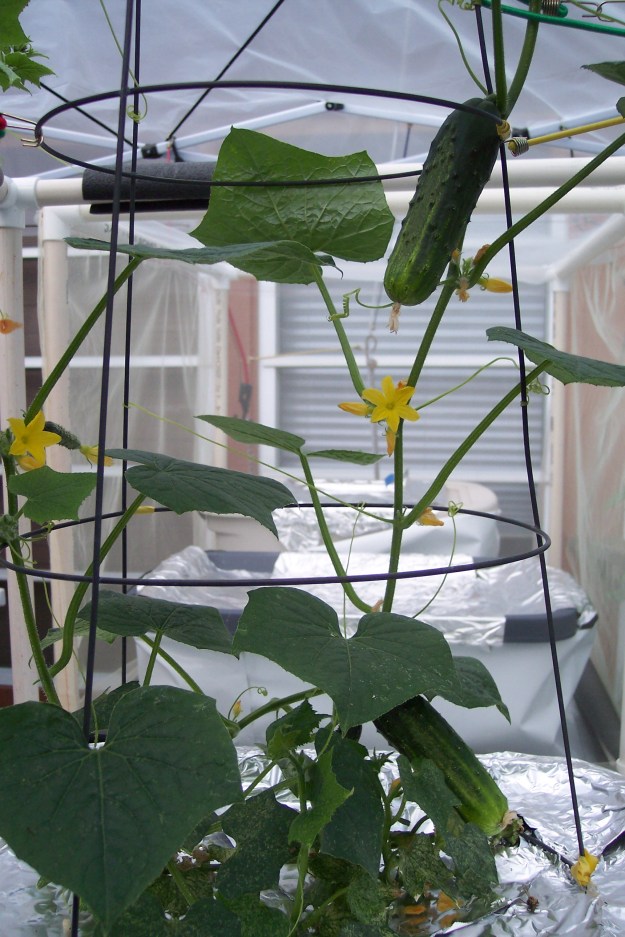
Pickling cucumbers when they were growing on the deck. They were direct seeded in 5 gal buckets, to grow up the plastic netting and wood frame trellis on the deck.

My favorite varieties of pickling cukes have turned out to be ‘Homemade Pickles’, ‘H-19 Little Leaf’, ‘Jackson Classic’ and ‘Diamant’.

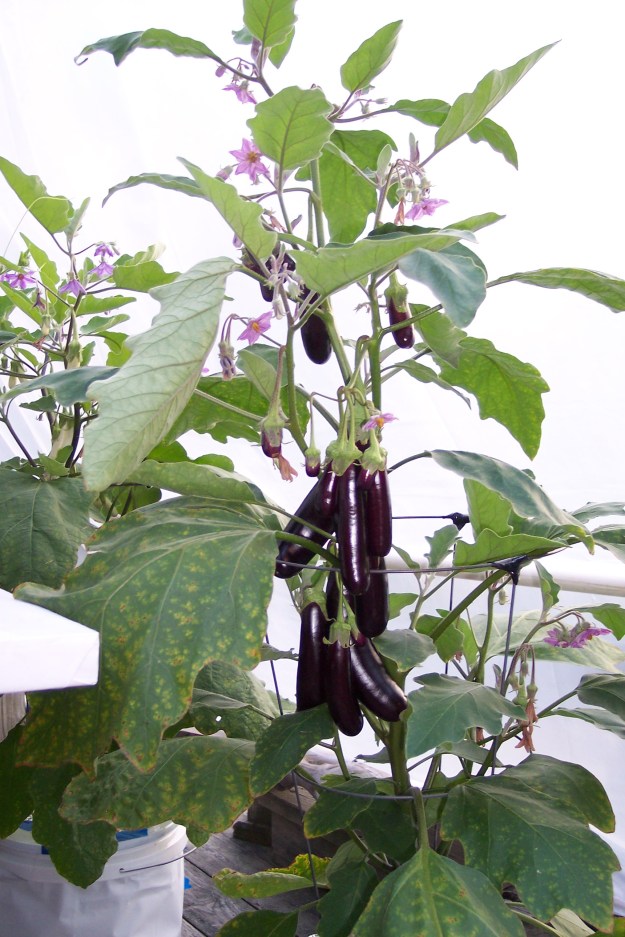
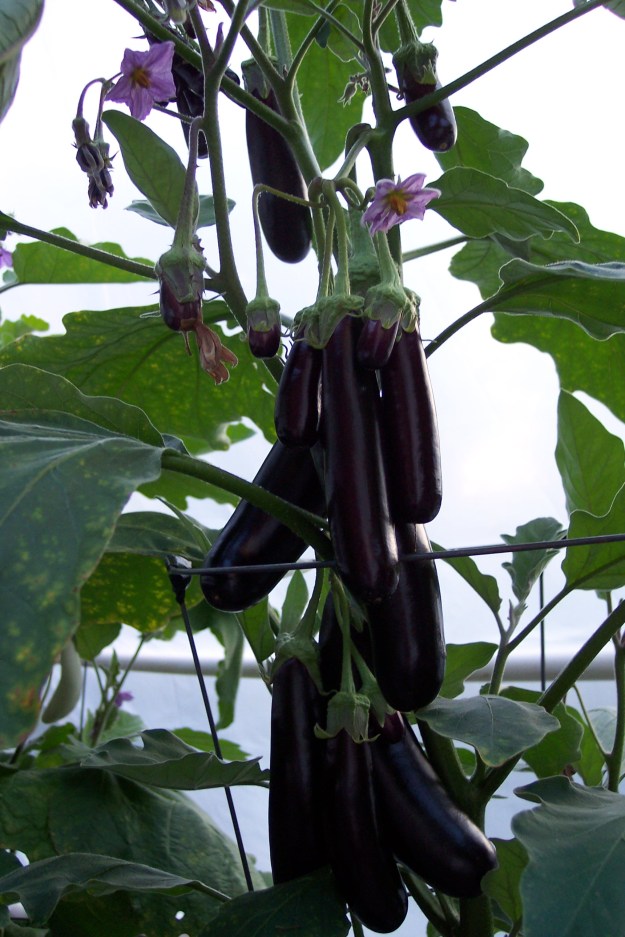
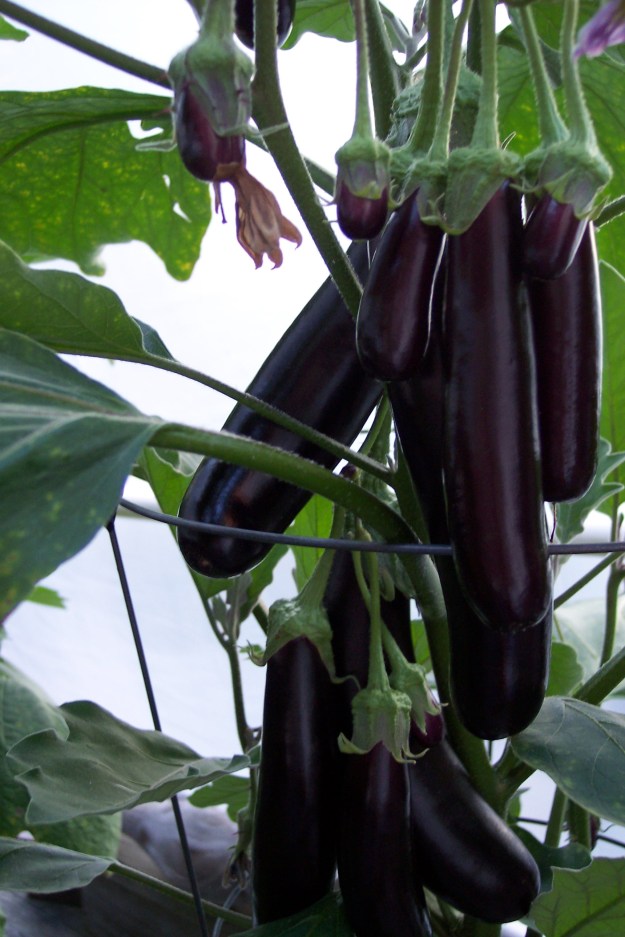
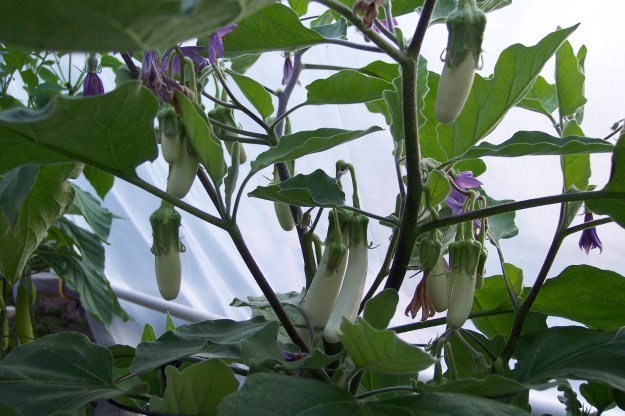
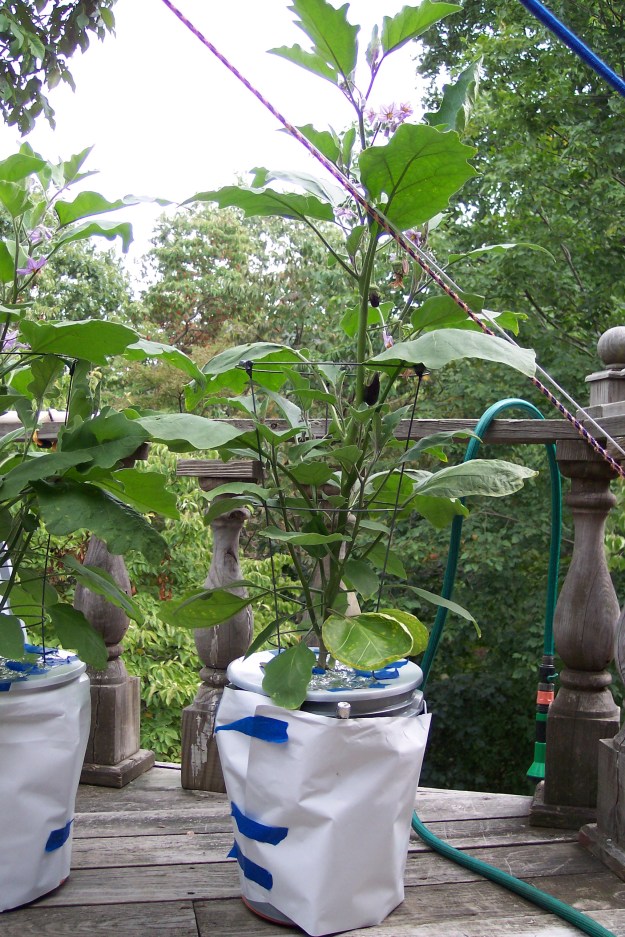
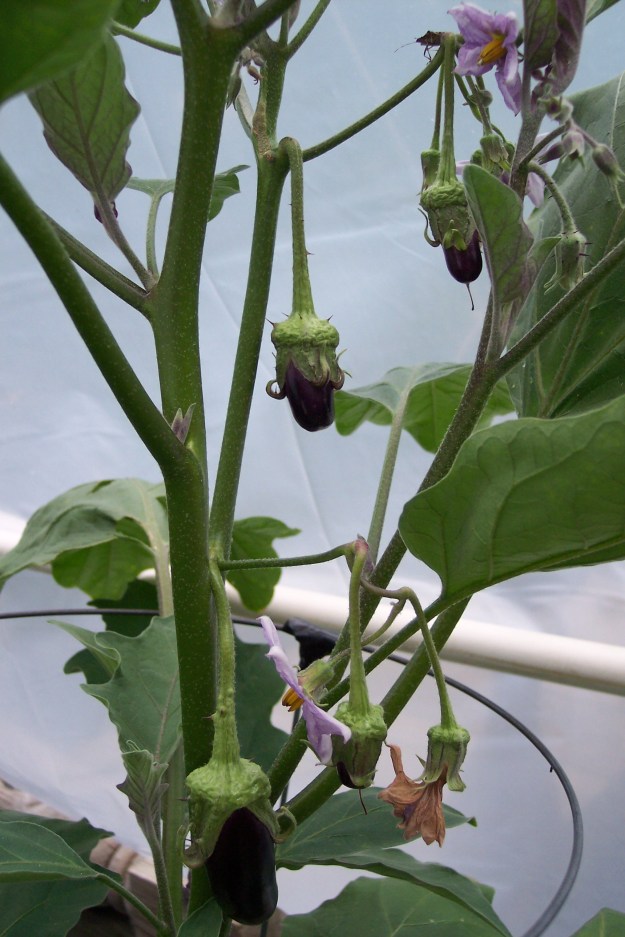
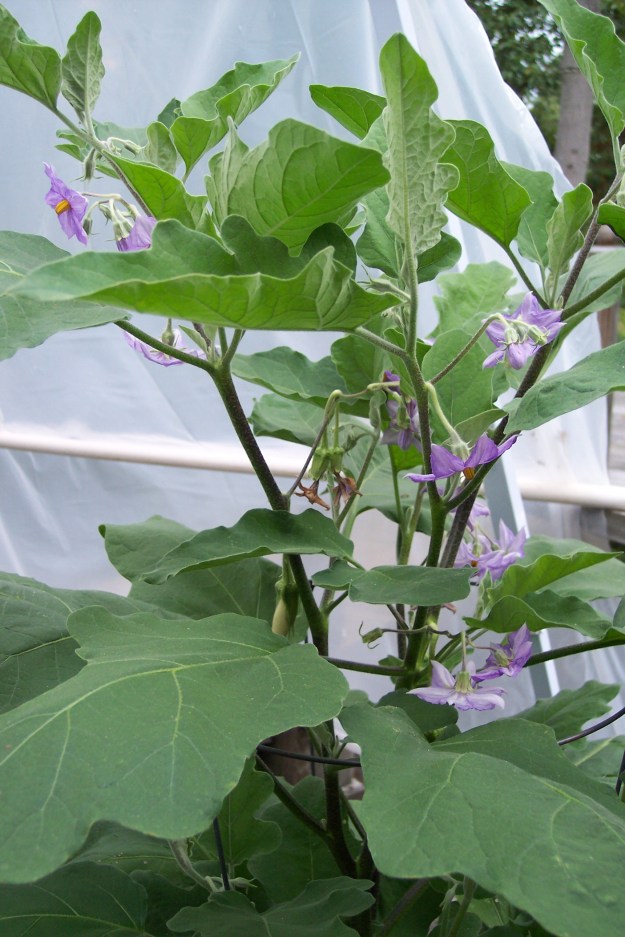
Baby eggplant seedlings (‘Hansel’, ‘Gretel’ and ‘Fairy Tale’) were direct seeded in the large square white pots. Eventually, when the plants were too wide for the netting, the net covers came off but the tomato cages (legs shortened and stuck in the soil), stayed on, in order to help support the 2 ft+ eggplant plants.


tomatoes, peppers, basil

Juliet (large grape type) & Better Boy tomatoes, Sweet Large Leaf basil and Banana peppers in the yard